
CentOS8.1でWordPressを構築 (nginx + MariaDB + php-fpm)
環境
仮想マシン:CentOS Linux release 8.1.1911 (Core)
最小化パッケージ
固定IP(プライベートアドレス)
CentOS8で最低限必要と思われるパッケージをインストール
WordPressをインストール・実行の要件
CentOS8 + NGINX で構成するので最低限必要と思われるパッケージをインストール
「nginx」「mariadb」「mariadb-server」「php-fpm」
- WebServer:nginx.x86_64
- DB:mariadb.x86_64 mariadb-server.x86_64
- FastCGI:php-fpm.x86_64
# dnf install nginx.x86_64 mariadb.x86_64 mariadb-server.x86_64 php-fpm.x86_64
結局「nginx」「mariadb」「mariadb-server」「php-fpm」+依存関係でインストールされるものではWordPressの実行には不足がありましたので後述するパッケージを追加しています。
サービスを起動してみる。
「nginx」「mariadb」「mariadb-server」「php-fpm」をそれぞれ起動サービスとして登録しかつ即時実行する。
「nginx」の起動
# systemctl --now enable nginx
「php-fpm」の起動
# systemctl --now enable php-fpm
「mariadb」の起動
# systemctl --now enable mariadb
Firewalld(ポート着信許可設定)
# firewall-cmd --permanent --add-service=http
# firewall-cmd --permanent --add-service=https
# firewall-cmd --reload
# firewall-cmd --list-all
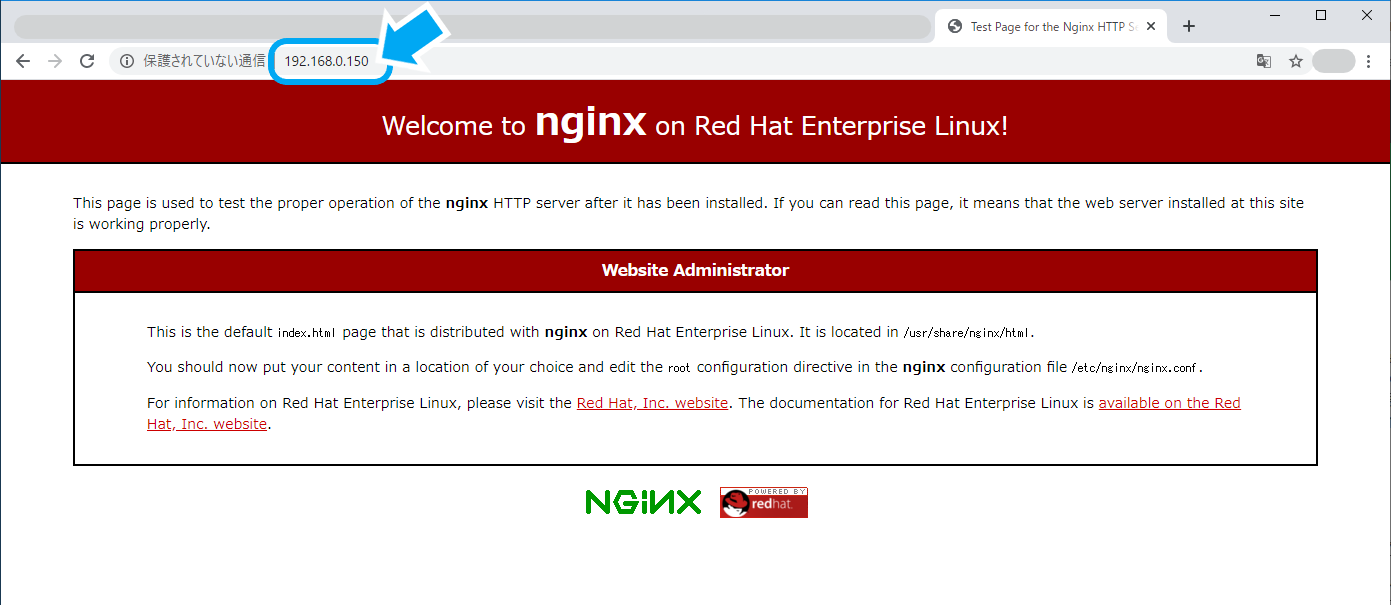
これで自サーバのIPアドレスでNGINXでアクセスすると下記のような画面が表示されます。
WordPressのダウンロードと展開
WordPressを展開するディレクトリに移動します。
# cd /var/www/
WordPressの最新版をダウンロードします。
# curl -O https://ja.wordpress.org/latest-ja.tar.gz
ダウンロードしたアーカイブを展開します
# tar zxf latest-ja.tar.gz
展開したディレクトリと配下のファイルのアクセス権を変更します。
# chown -R nginx. wordpress/
PHP-FPMの設定
ファイル編集
# vi /etc/php-fpm.d/www.conf
「www.conf」ファイルはインストール時に展開されているデフォルトのモノを使います。
最低限の変更内容はプロセスのユーザとSocketのファイルPATHで赤字で記載の箇所です。使っていくうちにいろいろ調整することもあります。
|
nginxの設定
設定内容はNGINXの「要約された基本セットアップ」の項目に基づいて設定します。

ファイル編集
# vi /etc/nginx/conf.d/wordpress.conf
変更内容は赤字で記載
|
MariaDBの初期設定
「mysql_secure_installation」ツールを実行します。
ツールを実行して各設定項目で選択肢を選択することで初期設定を実行します。
# mysql_secure_installation
~]# mysql_secure_installation

NOTE: RUNNING ALL PARTS OF THIS SCRIPT IS RECOMMENDED FOR ALL MariaDB
      SERVERS IN PRODUCTION USE!  PLEASE READ EACH STEP CAREFULLY!

In order to log into MariaDB to secure it, we'll need the current
password for the root user.  If you've just installed MariaDB, and
you haven't set the root password yet, the password will be blank,
so you should just press enter here.

Enter current password for root (enter for none):
OK, successfully used password, moving on...

Setting the root password ensures that nobody can log into the MariaDB
root user without the proper authorisation.

Set root password? [Y/n]
New password:
Re-enter new password:
Password updated successfully!
Reloading privilege tables..
 ... Success!


By default, a MariaDB installation has an anonymous user, allowing anyone
to log into MariaDB without having to have a user account created for
them.  This is intended only for testing, and to make the installation
go a bit smoother.  You should remove them before moving into a
production environment.

Remove anonymous users? [Y/n]
 ... Success!

Normally, root should only be allowed to connect from 'localhost'.  This
ensures that someone cannot guess at the root password from the network.

Disallow root login remotely? [Y/n]
 ... Success!

By default, MariaDB comes with a database named 'test' that anyone can
access.  This is also intended only for testing, and should be removed
before moving into a production environment.

Remove test database and access to it? [Y/n]
 - Dropping test database...
 ... Success!
 - Removing privileges on test database...
 ... Success!

Reloading the privilege tables will ensure that all changes made so far
will take effect immediately.

Reload privilege tables now? [Y/n]
 ... Success!

Cleaning up...

All done!  If you've completed all of the above steps, your MariaDB
installation should now be secure.

Thanks for using MariaDB!
#
MariaDBの文字コード変更
# vi /etc/my.cnf.d/mariadb-server.cnf
ここで変更するのは文字コードのみです。
ファイルの編集後サービスを再起動します。
# systemctl restart mariadb
ファイル内容(赤字箇所のみ変更)
|
# systemctl restart mariadb
ここでインストールしたWordPressにアクセスすると
「お使いのサーバーの PHP では WordPress に必要な MySQL 拡張を利用できないようです。」
と表示されます。
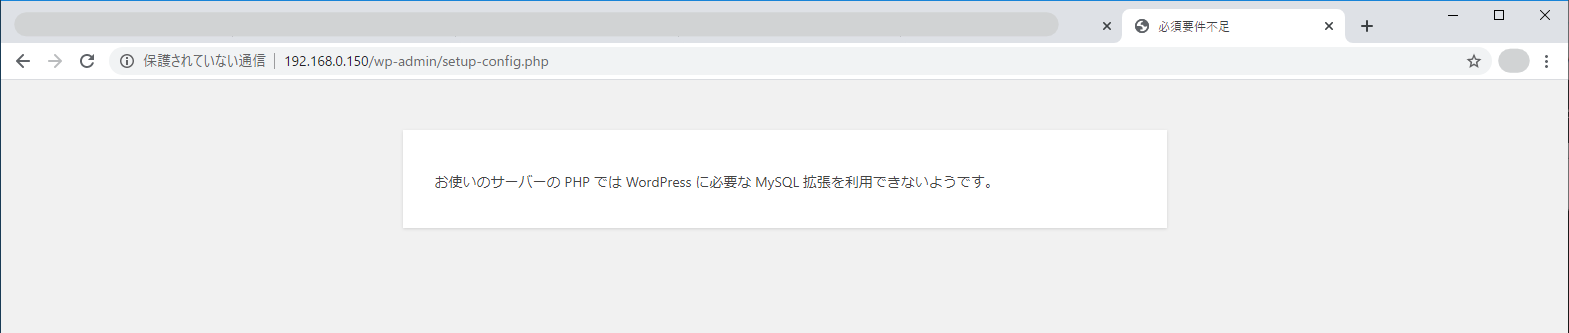
あれ?パッケージが足りない?
「php-mysqlnd.x86_64」をインストールしてみます。
# dnf install php-mysqlnd.x86_64
サイトに重大なエラーがありました。WordPress でのデバッグをさらに詳しく見る。
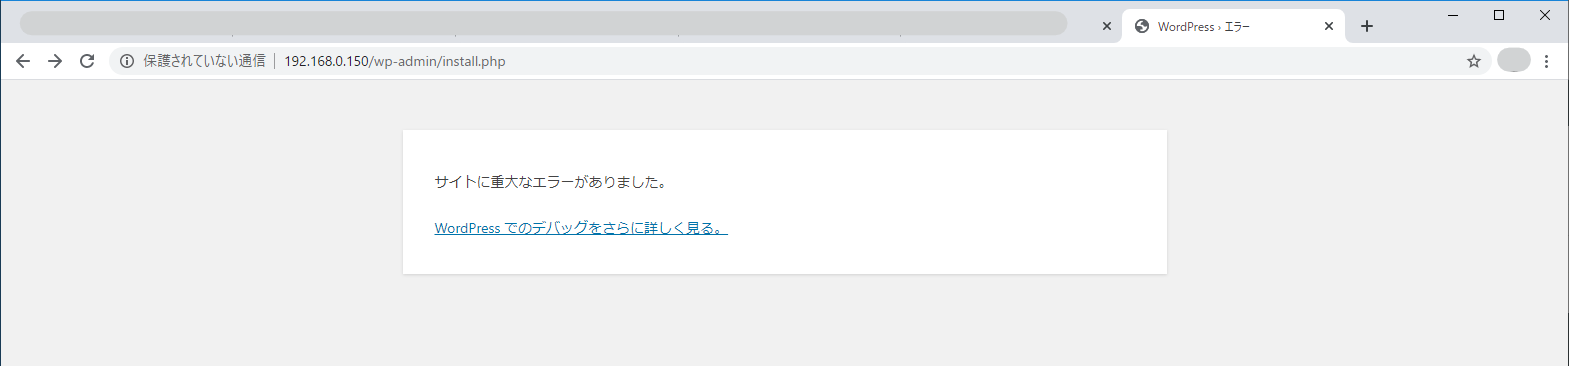
まだ、アクセスできない!!
原因を特定するためログを参照します。
# view /var/log/nginx/error.log
2020/05/06 02:42:47 [error] 5109#0: *12 FastCGI sent in stderr: "PHP message: PHP Fatal error:  Uncaught Error: Call to undefined function json_decode() in /var/www/wordpress/wp-includes/blocks/shortcode.php:25
Stack trace:
#0 /var/www/wordpress/wp-includes/class-wp-hook.php(287): register_block_core_shortcode('')
#1 /var/www/wordpress/wp-includes/class-wp-hook.php(311): WP_Hook->apply_filters(NULL, Array)
#2 /var/www/wordpress/wp-includes/plugin.php(478): WP_Hook->do_action(Array)
#3 /var/www/wordpress/wp-settings.php(540): do_action('init')
#4 /var/www/wordpress/wp-admin/setup-config.php(33): require('/var/www/wordpr...')
#5 {main}
  thrown in /var/www/wordpress/wp-includes/blocks/shortcode.php on line 25" while reading response header from upstream, client: 192.168.0.5, server: 192.168.0.150, request: "GET /wp-admin/setup-config.php HTTP/1.1", upstream: "fastcgi://unix:/run/php-fpm/www.sock:", host: "192.168.0.150"
# dnf install php-json
アクセスできました。
DBの設定が済んでいないので[さあ、始めましょう!]はしません。
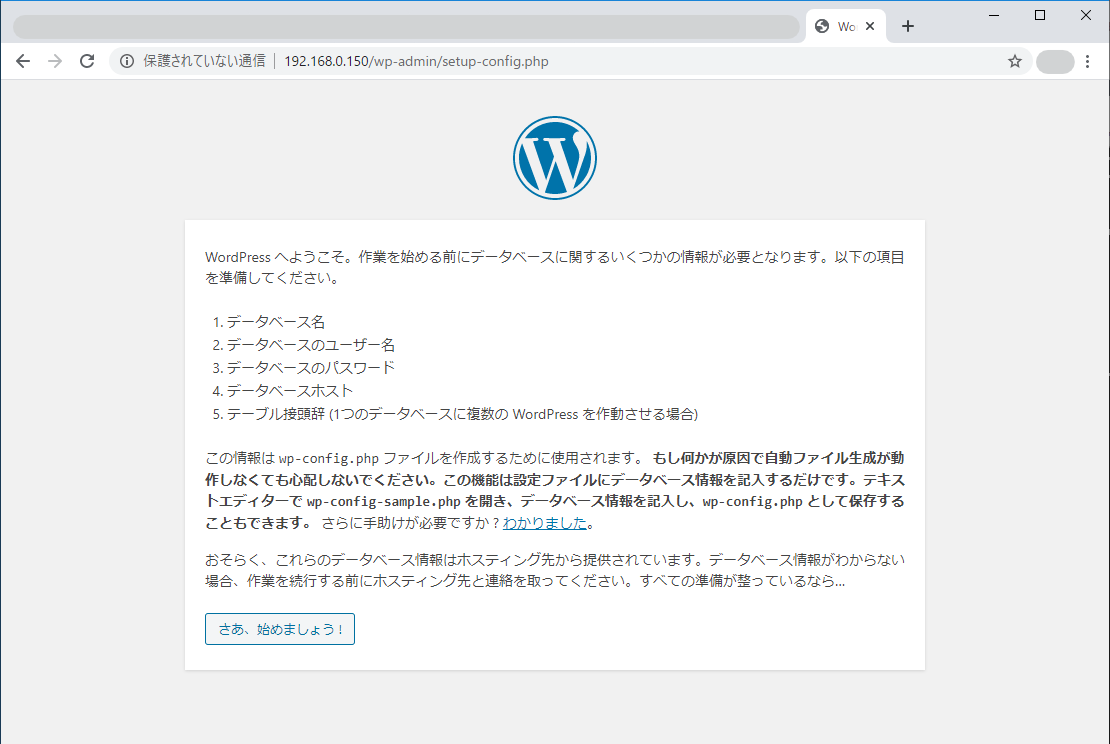
WordPressから利用するためのMariaDBの設定
MariaDB(mysql)にログインするときのパスワードは「-p」の後ろにスペースなどを入れずに「mysql -u root -proootpassword」と入力します。
使い慣れた人には信じられないのでしょうが「mysqlにログインできない。」という申告のほとんどが「-p」の後にスペースを入れてしまっているものです。
wordpress用データベース作成
~]# mysql -u root -p■■■■■■■■■■
Welcome to the MariaDB monitor. Commands end with ; or \g.
Your MariaDB connection id is 11
Server version: 10.3.17-MariaDB MariaDB Server

Copyright (c) 2000, 2018, Oracle, MariaDB Corporation Ab and others.

Type 'help;' or '\h' for help. Type '\c' to clear the current input statement.

MariaDB [(none)]> CREATE DATABASE wordpress;
Query OK, 1 row affected (0.000 sec)

MariaDB [(none)]>
データベース管理ユーザ作成
MariaDB [(none)]> GRANT ALL PRIVILEGES ON wordpress.* TO "wpadmin"@"localhost" IDENTIFIED BY "zxcvbnm,1";
Query OK, 0 rows affected (0.000 sec)

MariaDB [(none)]> FLUSH PRIVILEGES;
Query OK, 0 rows affected (0.000 sec)

MariaDB [(none)]>exit
Bye
~]#
WordPressのインストール
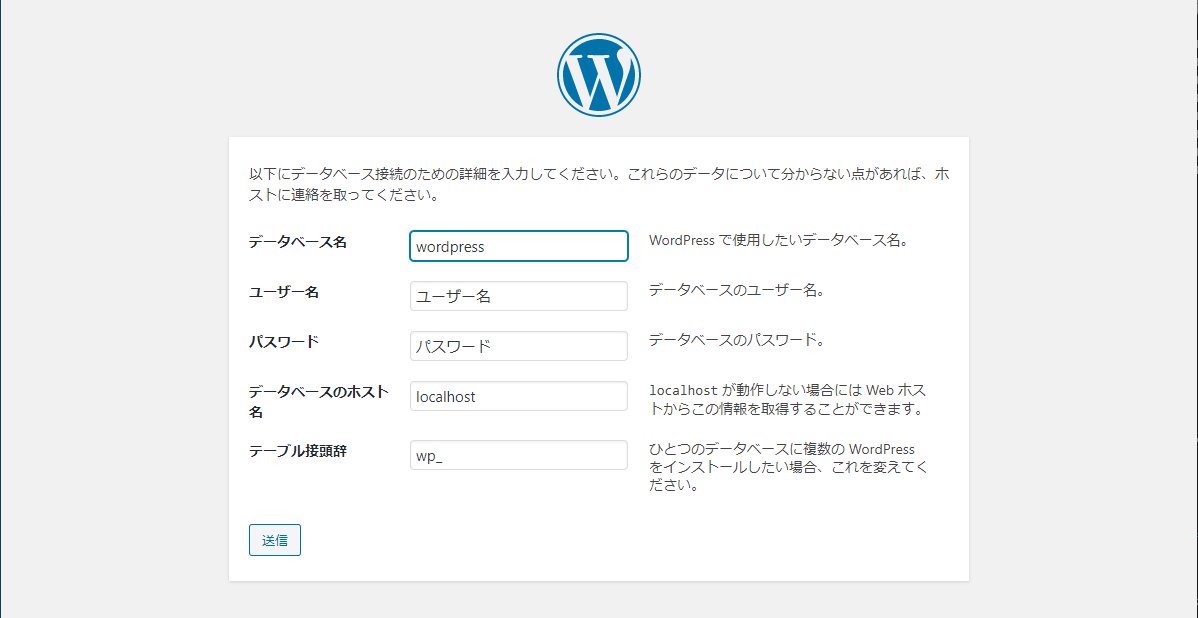
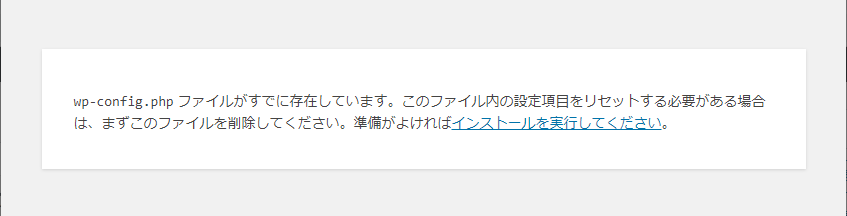
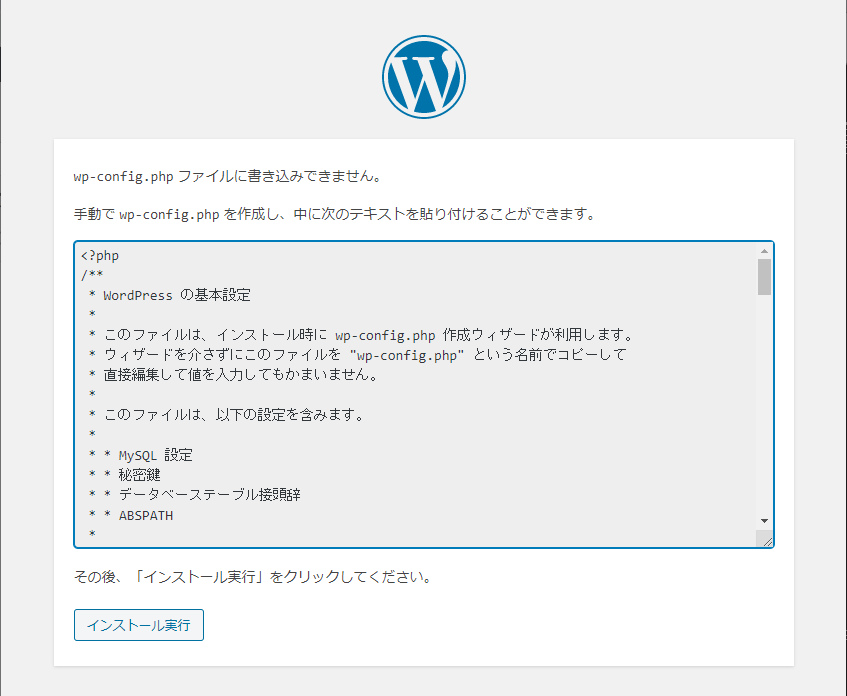
wp-config設定
ブラウザからWorPressにアクセスして設定

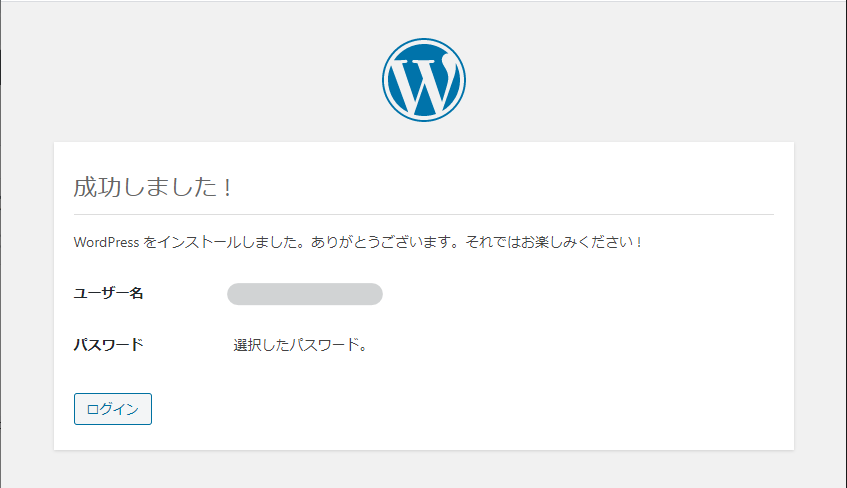
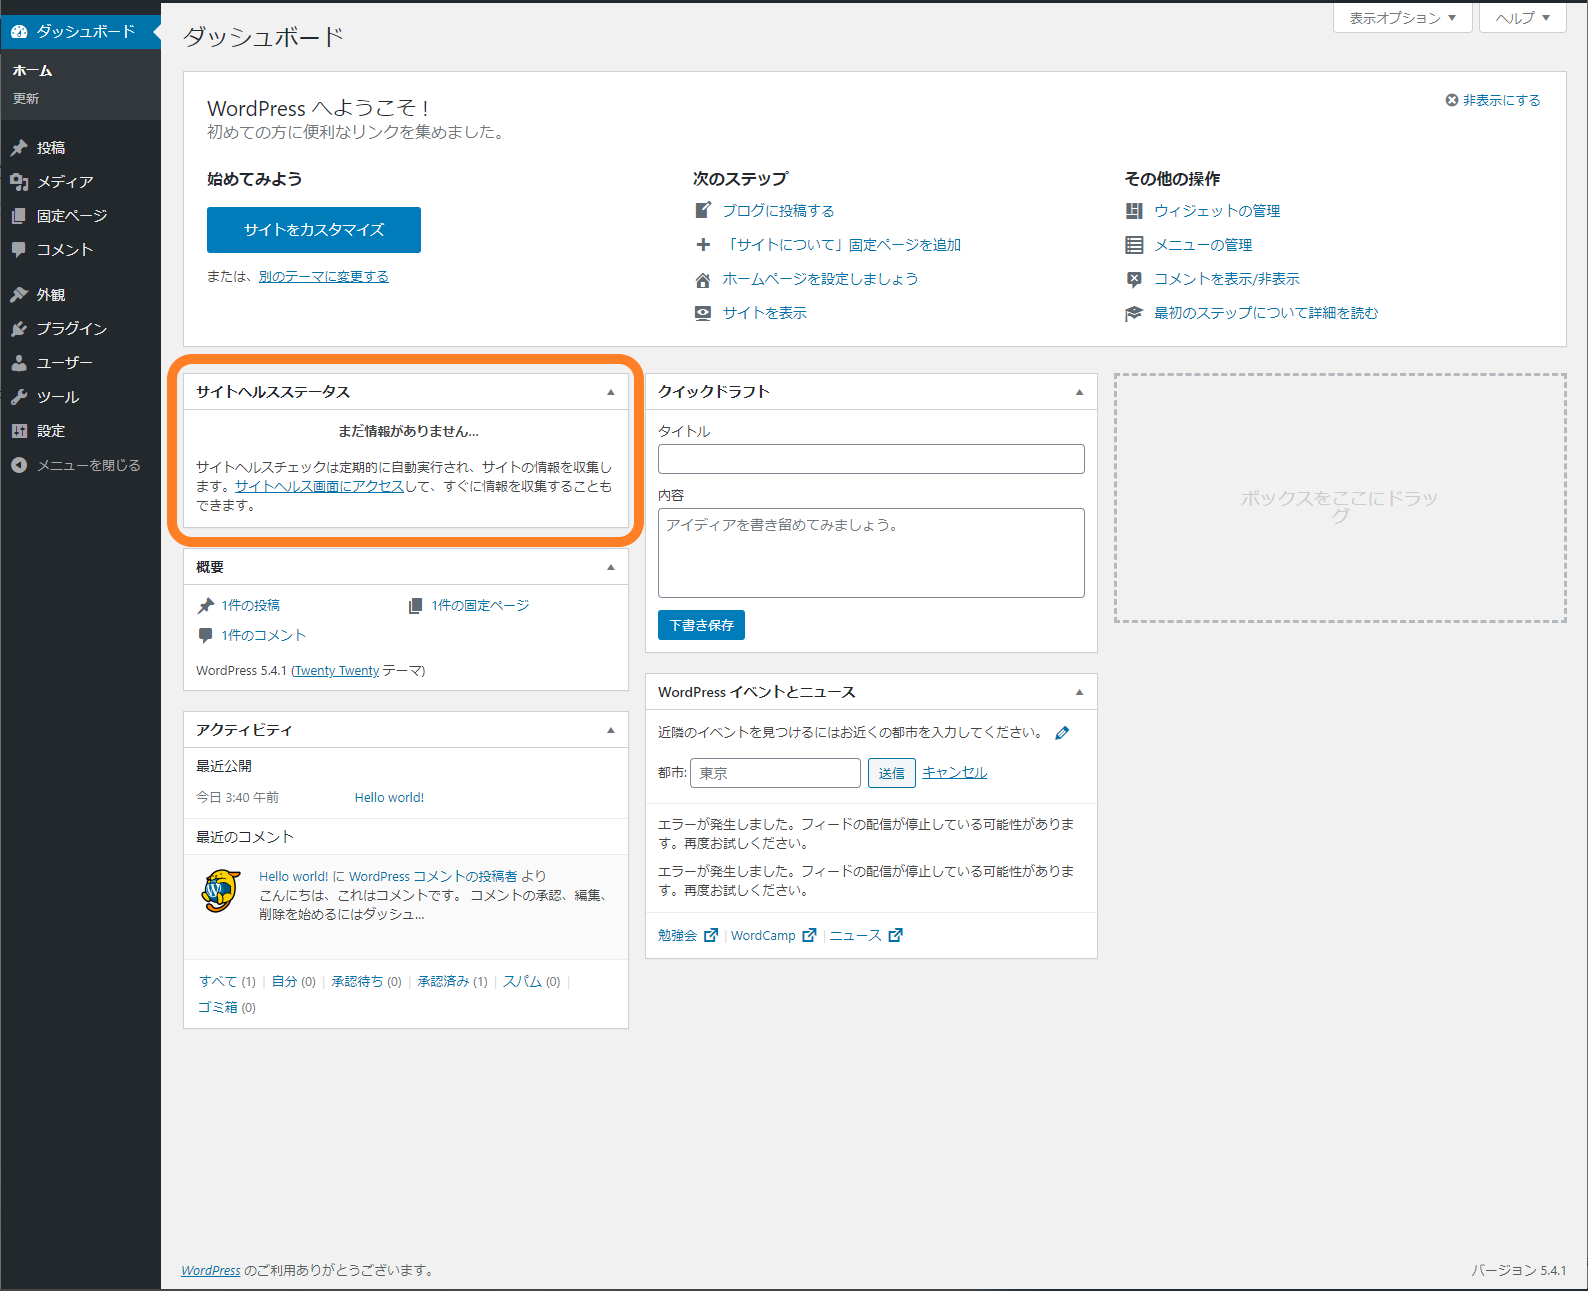
WordPressのインストールが完了しました。
サイトヘルスステータスの確認
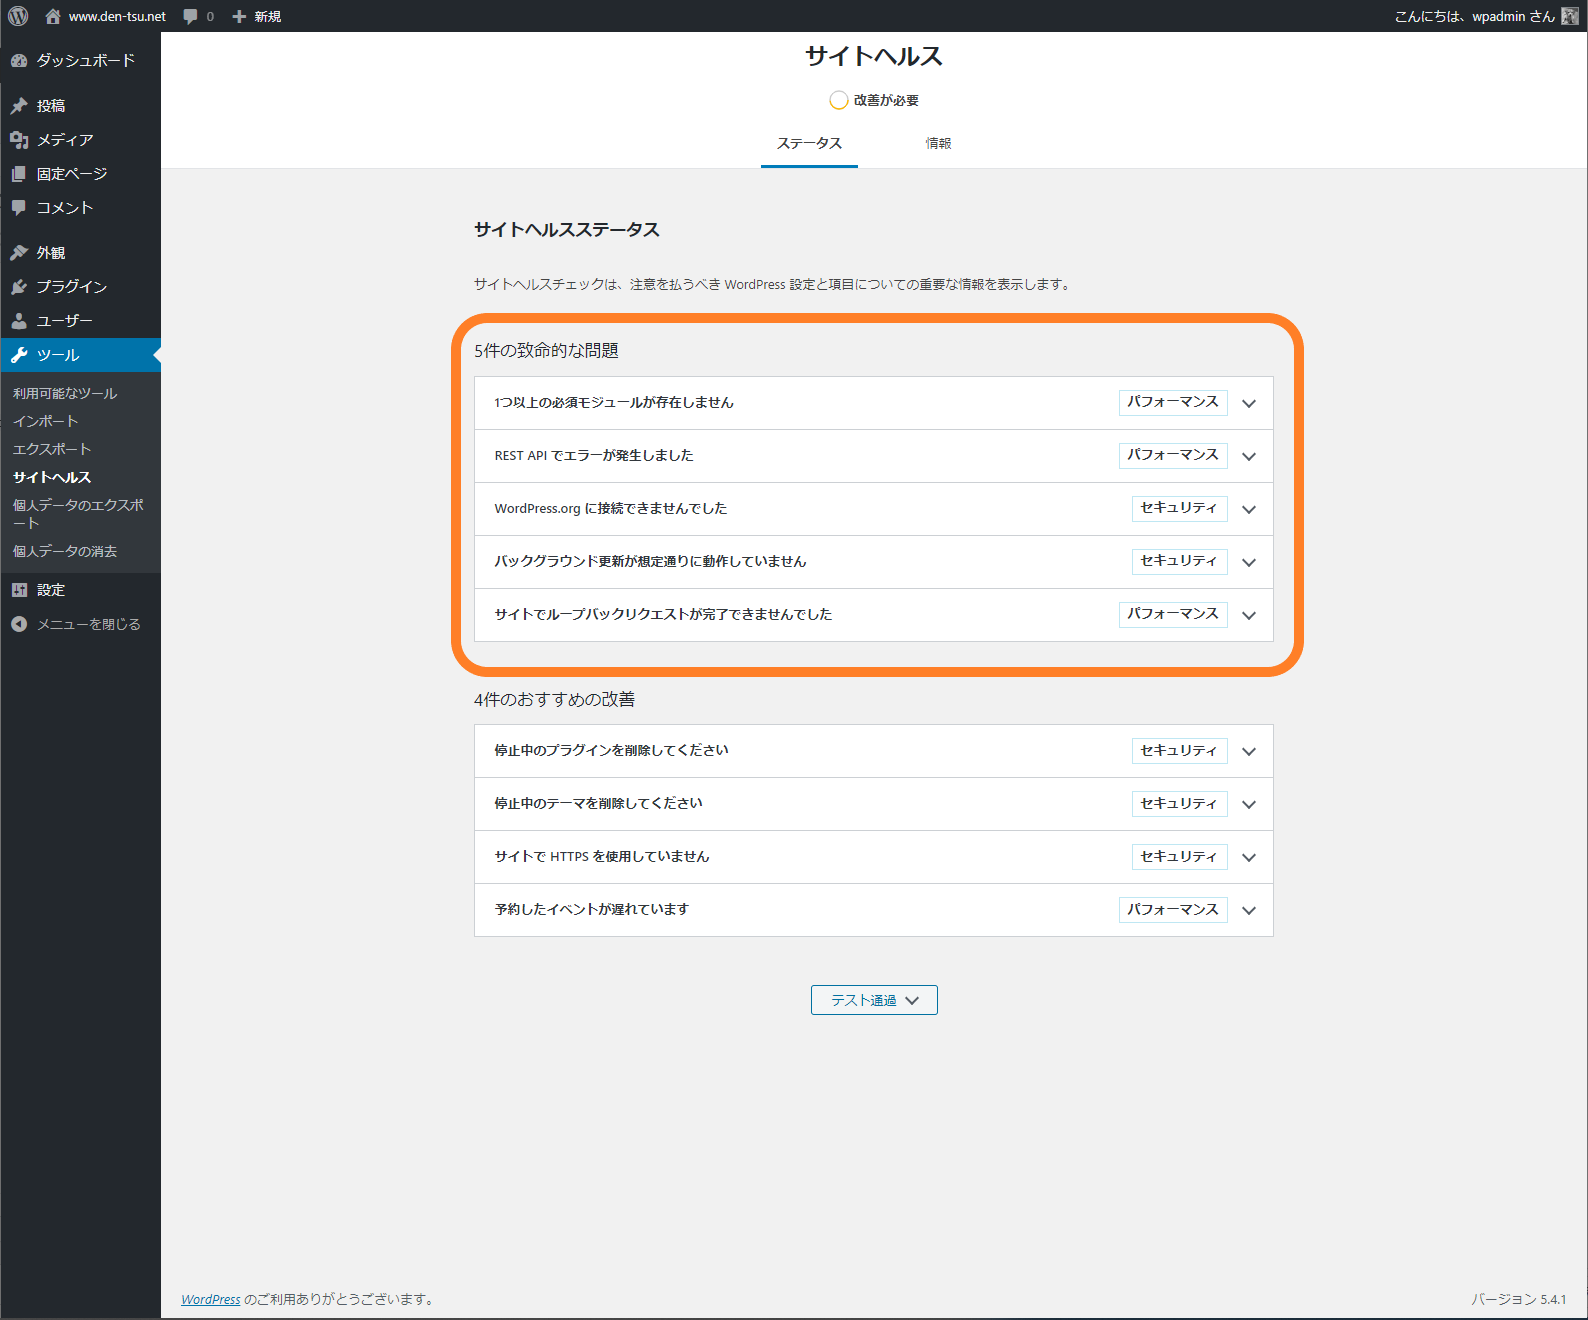
対処① SElinuxの一時停止
まだ「1つ以上の必須モジュールが存在しません」と表示されます。
<詳細情報>
1件の致命的な問題
1つ以上の必須モジュールが存在しません[パフォーマンス]
PHP モジュールはサイトの稼働に必要なほとんどのタスクをサーバー上で実行します。変更はサーバー管理者が実施する必要があります。
WordPress ホスティングチームでは、こうした推奨されていたり必須とされていたりするモジュールのリストをチームのハンドブック (新しいタブで開く)でメンテナンスしています。
- 警告 オプションのモジュール dom がインストールされていないか、無効化されています。
- 警告 オプションのモジュール mbstring がインストールされていないか、無効化されています。
- 警告 オプションのモジュール imagick がインストールされていないか、無効化されています。
- 警告 オプションのモジュール zip がインストールされていないか、無効化されています。
- エラー 必須モジュール gd がインストールされていないか、無効化されています。
「エラー 必須モジュール gd がインストールされていないか、無効化されています。」が解消せず残りました。
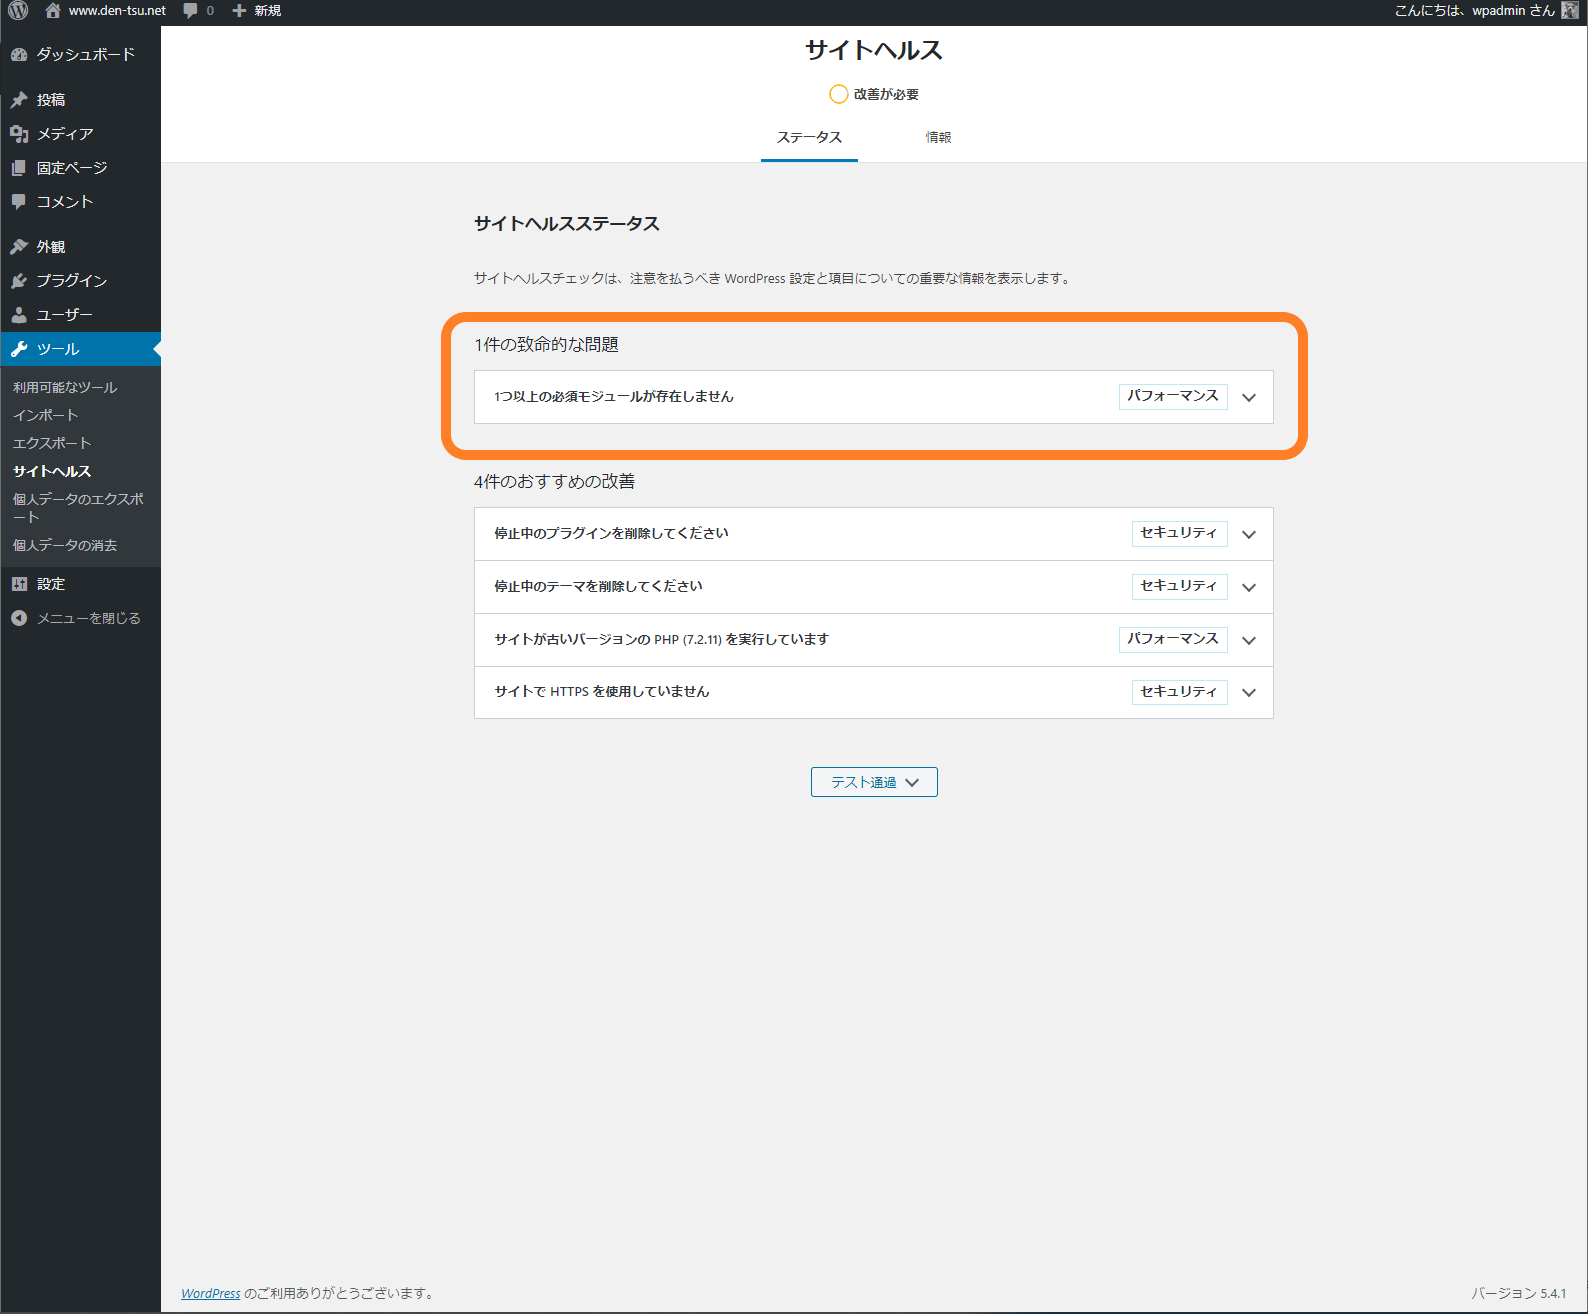
1件の致命的な問題
1つ以上の必須モジュールが存在しません
関連のありそうなPHPモジュールをテキトーにインストールします。
# dnf install php-gd.x86_64 php-xml.x86_64 php-mbstring.x86_64 php-pecl-zip.x86_64
「致命的な問題」については解消されました。
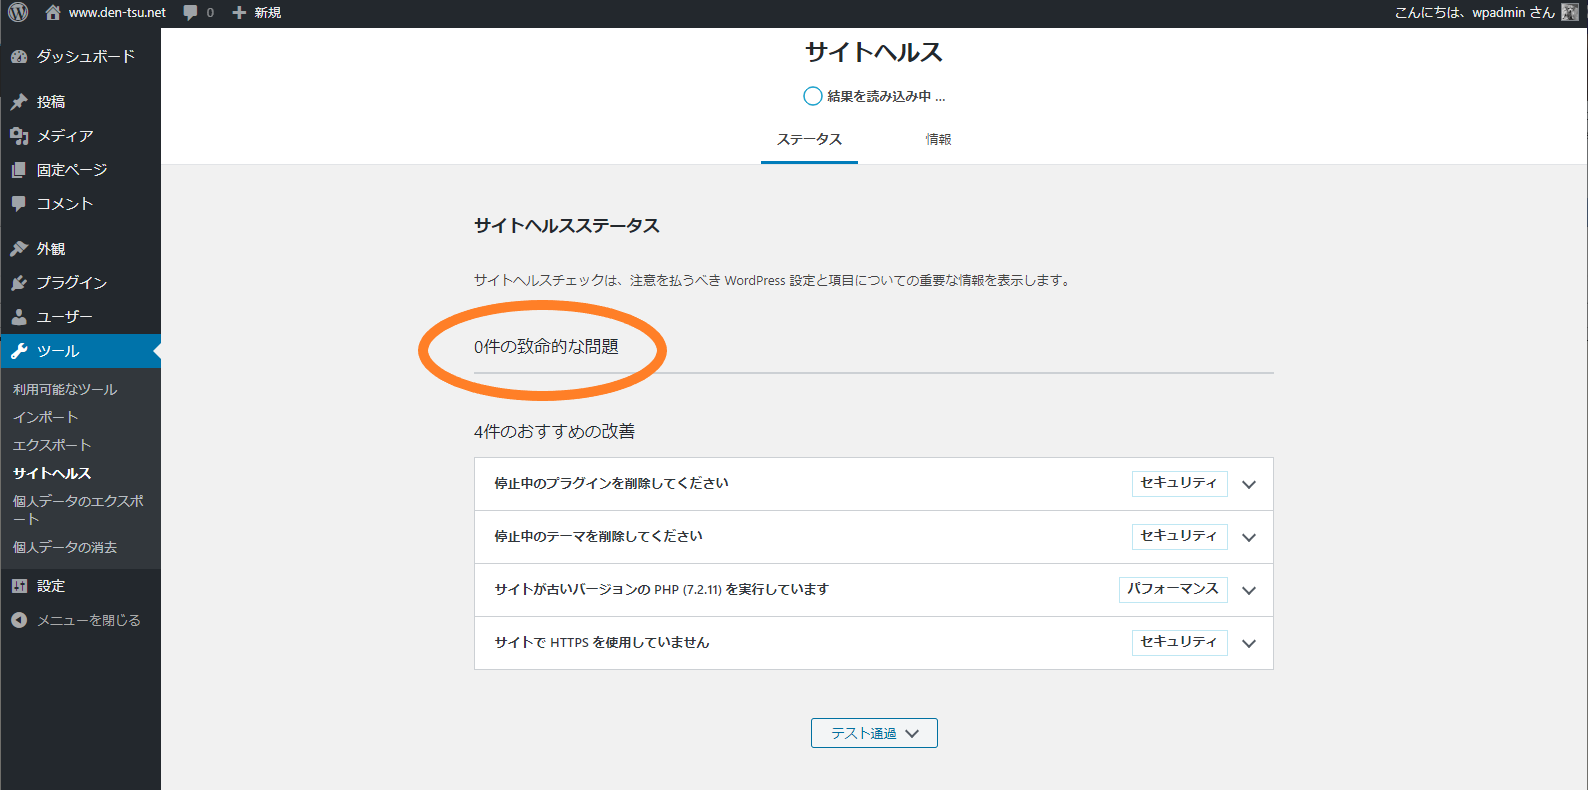 次は「4件のおすすめの改善」へ進みます。